Introduction to Red Velvet Cupcakes
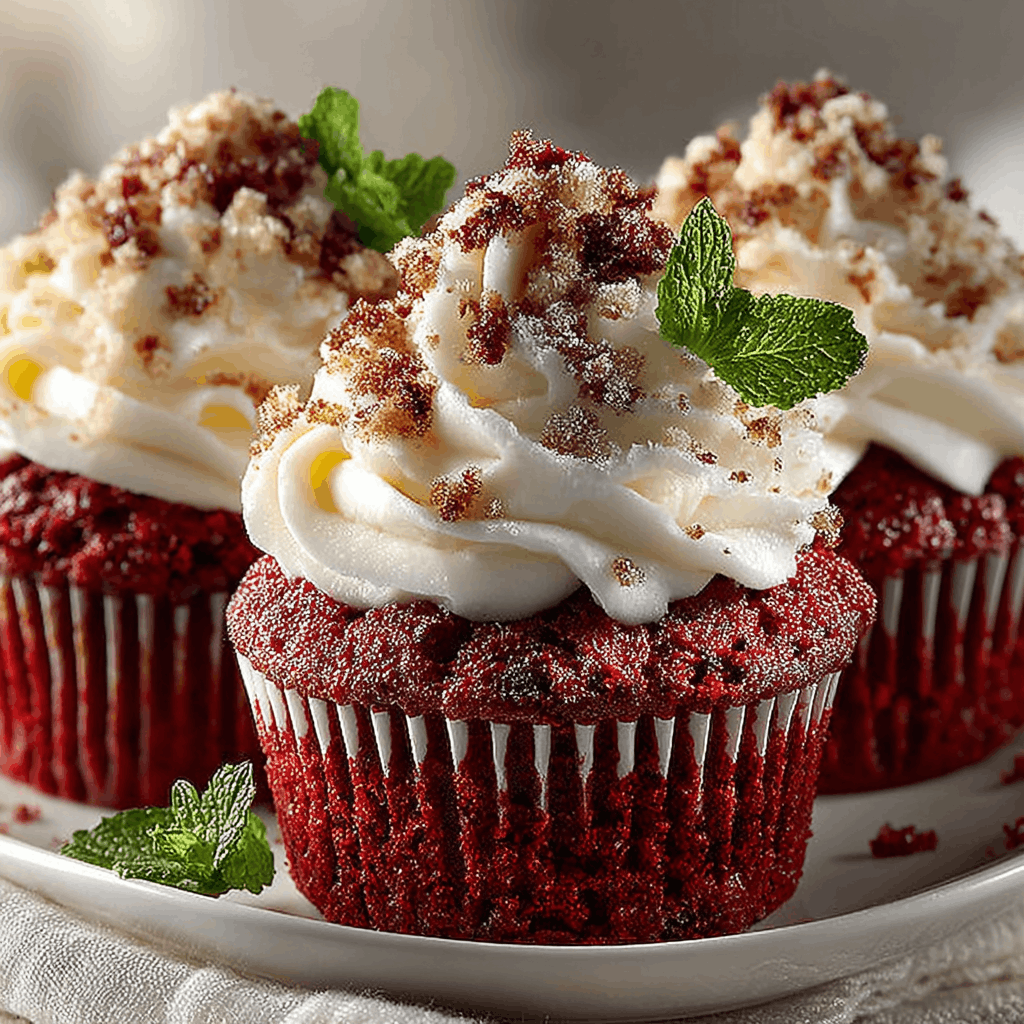
There’s something magical about Red Velvet Cupcakes that makes them a favorite in my kitchen. Maybe it’s the vibrant color or the rich, velvety texture that brings a smile to everyone’s face. As a busy mom, I know how precious time is, and this recipe is a quick solution for those days when you want to impress your loved ones without spending hours in the kitchen. These delightful cupcakes are not just a treat; they’re a celebration in every bite. So, let’s dive into this delicious adventure together!
Why You’ll Love This Red Velvet Cupcakes
These Red Velvet Cupcakes are a dream come true for busy moms and professionals alike. They’re incredibly easy to whip up, taking just over 40 minutes from start to finish. The taste? Oh, it’s a delightful balance of sweet and tangy, with that signature cream cheese frosting that makes every bite feel like a hug. Plus, they’re perfect for any occasion, whether it’s a birthday party or a cozy family dinner.
Ingredients for Red Velvet Cupcakes
Gathering the right ingredients is the first step to creating these delightful Red Velvet Cupcakes. Here’s what you’ll need:
- All-purpose flour: This is the backbone of your cupcakes, providing structure and texture.
- Granulated sugar: Sweetness is key! It balances the tanginess of the buttermilk.
- Baking soda: This helps the cupcakes rise, giving them that fluffy texture we all love.
- Cocoa powder: Just a hint of cocoa adds depth to the flavor without overpowering the red velvet essence.
- Salt: A pinch enhances all the flavors, making them pop.
- Vegetable oil: This keeps the cupcakes moist and tender, ensuring they stay delicious for days.
- Buttermilk: The secret ingredient! It adds a tangy flavor and helps create that velvety texture.
- Large eggs: Eggs bind everything together and add richness to the batter.
- Red food coloring: This gives the cupcakes their signature vibrant hue. You can use gel or liquid, but gel is more concentrated.
- Vanilla extract: A splash of vanilla adds warmth and enhances the overall flavor.
- White vinegar: This reacts with the baking soda, helping the cupcakes rise and adding a subtle tang.
For the frosting:
- Cream cheese: The star of the frosting! It provides a rich, tangy flavor that pairs perfectly with the cupcakes.
- Unsalted butter: This adds creaminess and helps achieve that smooth texture.
- Powdered sugar: Sweetens the frosting and gives it that fluffy consistency.
- Vanilla extract (for frosting): Just like in the batter, it adds a lovely aroma and flavor.
For exact measurements, check the bottom of the article where you can find everything listed for easy printing. Happy baking!
How to Make Red Velvet Cupcakes
Now that we have our ingredients ready, let’s dive into the fun part: making these scrumptious Red Velvet Cupcakes! Follow these simple steps, and you’ll have a batch of delightful treats in no time.
Step 1: Preheat the Oven and Prepare the Pan
First things first, preheat your oven to 350°F (175°C). This step is crucial because it ensures your cupcakes bake evenly. While the oven warms up, line your cupcake pan with liners. I love using colorful liners; they add a cheerful touch to the presentation!
Step 2: Mix the Dry Ingredients
In a large mixing bowl, combine the all-purpose flour, granulated sugar, baking soda, cocoa powder, and salt. Whisk them together until they’re well blended. This step is important because it helps distribute the leavening agents evenly, ensuring your cupcakes rise beautifully.
Step 3: Combine the Wet Ingredients
In another bowl, whisk together the vegetable oil, buttermilk, eggs, red food coloring, vanilla extract, and white vinegar. The vibrant red color will start to shine through! Mixing these wet ingredients well is key to achieving that rich, velvety texture we all love in Red Velvet Cupcakes.
Step 4: Combine Wet and Dry Ingredients
Now, gently pour the wet mixture into the dry ingredients. Stir until just combined. Be careful not to overmix; a few lumps are perfectly fine! Overmixing can lead to dense cupcakes, and we want them light and fluffy.
Step 5: Fill the Cupcake Liners
Using a scoop or a measuring cup, fill each cupcake liner about two-thirds full with batter. This allows room for the cupcakes to rise without overflowing. Trust me, it’s better to have a little less batter than too much!
Step 6: Bake the Cupcakes
Place the cupcake pan in the preheated oven and bake for 20-22 minutes. To check for doneness, insert a toothpick into the center of a cupcake. If it comes out clean or with a few crumbs, they’re ready! If not, give them a couple more minutes.
Step 7: Cool the Cupcakes
Once baked, remove the cupcakes from the oven and let them cool in the pan for about 5 minutes. Then, transfer them to a wire rack to cool completely. This step is essential; frosting warm cupcakes can lead to a melty mess!
Step 8: Make the Cream Cheese Frosting
While the cupcakes cool, let’s whip up that luscious cream cheese frosting. In a mixing bowl, beat together the softened cream cheese and unsalted butter until smooth. Gradually add the powdered sugar and vanilla extract, mixing until fluffy. This frosting is the perfect complement to your cupcakes!
Step 9: Frost the Cupcakes
Once the cupcakes are completely cool, it’s time to frost them! Use a piping bag for a beautiful swirl, or simply spread the frosting with a knife. Don’t be shy; a generous dollop of frosting makes everything better!
Tips for Success
- Always measure your ingredients accurately for the best results.
- Let your eggs and buttermilk come to room temperature for a smoother batter.
- Use gel food coloring for a more vibrant hue without altering the batter’s consistency.
- Don’t skip the cooling step; it’s crucial for perfect frosting.
- Experiment with different frosting techniques for a fun presentation!
Equipment Needed
- Cupcake pan: A standard 12-cup pan works perfectly. You can also use silicone molds for easy release.
- Mixing bowls: A set of various sizes is handy. Glass or stainless steel are great options.
- Whisk: A balloon whisk is ideal for mixing ingredients smoothly.
- Measuring cups and spoons: Essential for accurate ingredient measurements.
- Piping bag: Use a zip-top bag with the corner snipped for frosting if you don’t have one.
Variations of Red Velvet Cupcakes
- Gluten-Free: Substitute all-purpose flour with a gluten-free blend to make these cupcakes suitable for gluten-sensitive friends.
- Vegan: Replace eggs with flaxseed meal and use plant-based butter and non-dairy milk for a delicious vegan version.
- Chocolate Chip: Add mini chocolate chips to the batter for a delightful surprise in every bite.
- Nutty Twist: Fold in chopped walnuts or pecans for added texture and flavor.
- Spiced Version: Incorporate a teaspoon of cinnamon or nutmeg for a warm, spiced flavor that complements the red velvet.
Serving Suggestions for Red Velvet Cupcakes
- Pair with Coffee: A rich cup of coffee enhances the sweetness of the cupcakes.
- Serve with Ice Cream: A scoop of vanilla ice cream adds a creamy contrast.
- Garnish with Fresh Berries: Strawberries or raspberries add a pop of color and freshness.
- Presentation: Use decorative plates or tiered stands for an elegant display.
FAQs about Red Velvet Cupcakes
As I’ve baked these delightful Red Velvet Cupcakes over the years, I’ve come across a few common questions. Let’s tackle them together!
Can I use regular milk instead of buttermilk?
While buttermilk adds that signature tang and moisture, you can substitute it with regular milk. Just add a teaspoon of vinegar or lemon juice to the milk and let it sit for about 5 minutes. This will mimic the acidity of buttermilk!
How do I store leftover cupcakes?
To keep your Red Velvet Cupcakes fresh, store them in an airtight container at room temperature for up to three days. If you want to keep them longer, pop them in the fridge for up to a week. Just remember to let them come to room temperature before enjoying!
Can I freeze these cupcakes?
Absolutely! These cupcakes freeze beautifully. Just make sure they’re completely cool, then wrap them tightly in plastic wrap and place them in a freezer-safe container. They can last up to three months. Thaw them in the fridge overnight before frosting.
What can I use instead of cream cheese frosting?
If cream cheese frosting isn’t your thing, you can try a classic buttercream or even a whipped cream frosting. A chocolate ganache would also be a delicious twist, adding a rich flavor to your Red Velvet Cupcakes!
Why are my cupcakes dense?
Dense cupcakes can be a result of overmixing the batter or not measuring ingredients accurately. Remember, mix until just combined and use the right measuring techniques for the best results!
Final Thoughts
Making Red Velvet Cupcakes is more than just baking; it’s about creating moments of joy and connection. Each bite is a reminder of the love and care we put into our kitchens, even on the busiest days. Whether you’re celebrating a special occasion or simply treating yourself, these cupcakes bring a touch of magic to any gathering. I hope you find as much happiness in baking and sharing these delightful treats as I do. So, roll up your sleeves, embrace the mess, and let the sweet aroma fill your home. Happy baking!
Print
Red Velvet Cupcakes: Discover the Secret Recipe Today!
- Prep Time: 20 minutes
- Cook Time: 22 minutes
- Total Time: 42 minutes
- Yield: 12 cupcakes 1x
- Category: Dessert
- Method: Baking
- Cuisine: American
- Diet: Vegetarian
Description
Delicious and moist red velvet cupcakes topped with cream cheese frosting, perfect for any occasion.
Ingredients
- 1 1/2 cups all-purpose flour
- 1 cup granulated sugar
- 1 teaspoon baking soda
- 1 teaspoon cocoa powder
- 1 teaspoon salt
- 1 cup vegetable oil
- 1 cup buttermilk
- 2 large eggs
- 2 tablespoons red food coloring
- 1 teaspoon vanilla extract
- 1 teaspoon white vinegar
- 8 oz cream cheese, softened
- 1/2 cup unsalted butter, softened
- 4 cups powdered sugar
- 1 teaspoon vanilla extract (for frosting)
Instructions
- Preheat the oven to 350°F (175°C) and line a cupcake pan with liners.
- In a bowl, mix together the flour, sugar, baking soda, cocoa powder, and salt.
- In another bowl, whisk together the oil, buttermilk, eggs, food coloring, vanilla extract, and vinegar.
- Combine the wet and dry ingredients until just mixed.
- Fill the cupcake liners about 2/3 full with the batter.
- Bake for 20-22 minutes or until a toothpick comes out clean.
- Let the cupcakes cool completely before frosting.
- For the frosting, beat together the cream cheese and butter until smooth, then gradually add the powdered sugar and vanilla extract.
- Frost the cooled cupcakes and enjoy!
Notes
- Ensure the cupcakes are completely cool before frosting to prevent melting.
- Store leftovers in an airtight container at room temperature for up to 3 days.
- For a richer flavor, let the cupcakes sit overnight before serving.
Nutrition
- Serving Size: 1 cupcake
- Calories: 320
- Sugar: 25g
- Sodium: 200mg
- Fat: 15g
- Saturated Fat: 8g
- Unsaturated Fat: 5g
- Trans Fat: 0g
- Carbohydrates: 40g
- Fiber: 1g
- Protein: 3g
- Cholesterol: 50mg